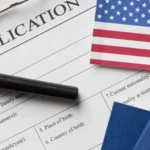

Applying for a US visa can feel confusing if you are looking at the process for the first time. Government instructions are often fragmented, technical, and written assuming prior knowledge. As a result, many applicants start filling forms or paying fees without fully understanding the steps involved—which increases the risk of mistakes, refusals, or delays.
- What Does the US Visa Application Process Look Like Overall?
- Step 1 – Understand Which US Visa You Need
- Step 2 – Prepare Information Before You Apply (Often Skipped)
- Step 3 – Fill the DS-160 Application Form
- Step 4 – Pay the US Visa Application Fee
- Step 5 – Book Biometrics and Interview Appointments
- Step 6 – Prepare Documents for the Visa Interview
- Step 7 – Attend the US Visa Interview
- Step 8 – Visa Decision and What Comes Next
- How Long Do US Visa Application Steps Take?
- Common Misunderstandings About the US Visa Procedure
- FAQs – US Visa Application Steps Explained
- Final Advice Before You Start Your US Visa Application
This guide explains the US visa application steps clearly and in the correct order, so you can understand the entire US visa procedure before you start. Whether you plan to apply on your own or later seek professional help, this article will give you a complete process overview so you know exactly what to expect.
What Does the US Visa Application Process Look Like Overall?
The US visa application process follows a fixed structure, regardless of the country you apply from. While appointment wait times and local procedures may differ, the steps themselves remain consistent worldwide.
At a high level, the process involves:
- Understanding which visa you need
- Completing an online application
- Paying the required fee
- Attending biometric and interview appointments
- Receiving a visa decision
What many applicants misunderstand is that starting the process too early—without preparation—often leads to errors. Understanding the steps first allows you to apply strategically instead of reactively.
If you are completely new, it helps to first review How to apply for US visa, which explains the application journey end to end at a beginner level.
Step 1 – Understand Which US Visa You Need
Choosing the correct visa category is the foundation of your application. Every other step depends on this decision.
Immigrant vs Non-Immigrant Visas (Quick Explanation)
- Non-immigrant visas are for temporary travel (tourism, business, study, short-term work)
- Immigrant visas are for permanent relocation and green cards
Most first-time applicants apply for non-immigrant visas, especially visitor and student categories.
Common Visa Categories for First-Time Applicants
- Visitor visas (tourism, business, family visits)
- Student visas
- Temporary work visas
- Family-based visas for close relatives
Applying under the wrong category is one of the most common and avoidable reasons for refusal. Before moving forward, review the Visa Types Hub to ensure your purpose of travel matches the visa you choose.
Step 2 – Prepare Information Before You Apply (Often Skipped)
This is one of the most overlooked steps in the US visa procedure, yet it is one of the most important.
Before filling any form, you should prepare:
- Passport details
- Employment or education history
- Travel history
- Financial information
- Contact details
- Purpose-of-travel explanation
Why This Step Matters
The US visa system checks for consistency. If your answers differ between forms, interviews, or documents, it can raise concerns—even if the difference is unintentional.
Featured snippet answer:
What should I prepare before applying for a US visa?
You should gather passport details, travel history, employment or education records, financial information, and a clear explanation of your travel purpose before starting the application.
Step 3 – Fill the DS-160 Application Form
The DS-160 is the official online application form used for most non-immigrant US visas. This form becomes the core record of your application.
What the DS-160 Covers
- Personal and passport details
- Travel plans
- Work or study background
- Security and eligibility questions
You must complete the form online and submit it electronically. After submission, you will receive a confirmation page, which is required for all future steps.
Common DS-160 Mistakes
- Rushing through answers
- Guessing dates or information
- Inconsistent employment details
- Incorrect travel purpose
Because the DS-160 cannot be easily edited after submission, accuracy matters. You can review detailed guidance on the DS-160 page before submitting.
Step 4 – Pay the US Visa Application Fee
Once the DS-160 is submitted, you must pay the US visa application fee (often called the MRV fee).
Important Points About the Fee
- It is non-refundable
- It does not guarantee approval
- The amount depends on visa type
- Payment methods vary by country
- The fee has a limited validity period
Many applicants make the mistake of paying the fee before fully understanding the process. You should only pay once you are confident your application details are correct.
Step 5 – Book Biometrics and Interview Appointments
After payment, you can schedule your appointments. In most countries, there are two separate appointments.
Biometrics (VAC) Appointment Explained
At the Visa Application Center (VAC), officials collect:
- Fingerprints
- A digital photograph
This step is administrative but mandatory.
Visa Interview Appointment Explained
The interview at the US embassy or consulate is where your application is evaluated. The consular officer decides whether to approve or refuse your visa based on:
- Your purpose of travel
- Your background
- Your ties to your home country
- Your answers during the interview
Appointment wait times vary widely depending on location and demand.
Step 6 – Prepare Documents for the Visa Interview
Documents support your application, but they do not replace clear answers.
Documents Required for All Applicants
- Passport
- DS-160 confirmation page
- Appointment letter
- Fee payment receipt
- Photograph (if applicable)
Documents That Support Your Intent
These vary by visa type and personal situation:
- Financial proof
- Employment or business documents
- Education records
- Proof of family or social ties
Document Purpose Table
| Document Type | Purpose | Mandatory |
|---|---|---|
| Passport | Identity & travel | Yes |
| DS-160 confirmation | Application record | Yes |
| Financial proof | Ability to fund trip | Supporting |
| Employment proof | Home-country ties | Supporting |
Submitting unnecessary or irrelevant documents does not improve approval chances and can sometimes create confusion.
Step 7 – Attend the US Visa Interview
The interview is usually short—often just a few minutes—but it is decisive.
What Officers Evaluate
- Whether your stated purpose is credible
- Whether you are likely to return home
- Whether your background matches your claims
How Answers Are Judged
Officers focus on:
- Clarity
- Consistency
- Confidence
Memorized answers, exaggerated claims, or unnecessary explanations often work against applicants.
Featured snippet answer:
What happens during a US visa interview?
A consular officer asks questions to assess your travel purpose, background, and intent to return home before deciding on approval or refusal.
Step 8 – Visa Decision and What Comes Next
After the interview, one of three outcomes follows.
Approval
Your passport is retained for visa stamping and returned within a few days or weeks.
Administrative Processing
Additional background checks are required. This is not a refusal but can cause delays.
Refusal
Your application is denied under US immigration law. A refusal is not a permanent ban and does not automatically prevent future applications.
How Long Do US Visa Application Steps Take?
Understanding timelines helps with realistic planning.
Typical Timeline Overview
| Step | Typical Time | Applicant Control |
|---|---|---|
| Preparation | 1–2 weeks | Yes |
| DS-160 completion | 1–2 hours | Yes |
| Appointment waiting | Days to months | No |
| Interview decision | Same day | No |
Delays are often caused by high demand rather than applicant error, but preparation reduces avoidable setbacks.
Common Misunderstandings About the US Visa Procedure
Many applicants rely on myths rather than facts.
- “More documents guarantee approval” – False
- “Agents can guarantee visas” – False
- “Interview is just a formality” – False
- “Refusal means permanent rejection” – False
Understanding the process realistically leads to better decisions and expectations.
FAQs – US Visa Application Steps Explained
What are the steps to apply for a US visa?
Choose the visa type, prepare information, submit DS-160, pay the fee, attend biometrics and interview, then wait for a decision.
Can I skip steps in the US visa process?
No. All steps are mandatory and must be completed in order.
Which step is most important in the US visa application?
The visa interview is the most decisive step, but preparation and form accuracy are equally critical.
Can I stop the process after starting DS-160?
Yes. You can stop before paying the fee or scheduling appointments.
Do I need all documents listed online?
No. Only relevant and accurate documents should be presented.
Final Advice Before You Start Your US Visa Application
Understanding the US visa application steps before starting puts you at a significant advantage. It helps you:
- Avoid costly mistakes
- Reduce stress
- Present a clear, consistent application
If your situation is complex, if you have previous refusals, or if you want expert validation before submitting, professional guidance can be valuable. A qualified advisor can help you prepare strategically—without false guarantees or shortcuts.
👉 Consider consulting a trusted US visa professional before starting your application.